Deltona 407-552-6217 Jacksonville 904-469-8310
License# CGC1525590

Author: ITZ Construction Team

What is the Difference Between Cabinet Painting and Cabinet Refinishing

Cabinet Painting Vs Cabinet Refinishing

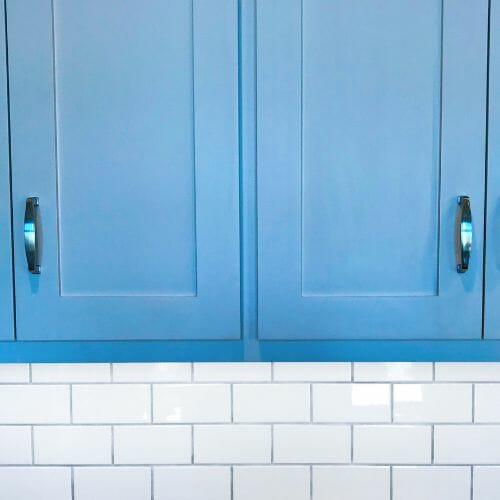
Kitchen remodels can be a tedious task but is worth every penny in the end. When it comes to  your kitchen, painting your cabinets is an affordable way to achieve a new look. However, there are a few things that you should know before beginning the project.

For example, if you’re not careful, your cabinet painting can end up looking blotchy and uneven. Paint will also attract dirt and debris, which can make it difficult to keep clean.

Preparation

Before you can start painting or staining cabinets, you need to make sure they’re prepared properly. This can be a daunting task, but it’s essential to ensure your cabinets will look great when they’re finished.

First, you need to clean the surfaces thoroughly using a degreasing cleaner and a damp sponge. This will remove any traces of oil and grease from the surface, which will help your paint job stay pristine.

Once the cabinet faces are clean, you can sand them down to roughen them up and make them more porous for primer. Use a medium sandpaper (we like 100- to 150-grit), and make sure your sanding doesn’t go too far, because you want to give the primer enough grit to stick to.

Once you’ve sanded down the cabinet face frames, it’s time to prime them with an oil-based primer. The primer is what will hold the paint in place, preventing it from peeling or chipping.

Materials

Cabinet refinishing involves removing the doors and drawer fronts of kitchen cabinets and replacing them with new cabinet skins (veneers or RTF, or “Rigid Thermofoil”). It is an affordable option for updating your kitchen.

It can be a big project, but the results are well worth it in the end. Refinishing requires a bit of patience, but the right preparation and paint will make the job last longer and look better than ever.

If you are painting your cabinets, choose a high-quality paint with a hard finish to protect them from wear and tear. Oil paint is the best choice, but top quality acrylic and water-based paints also do the trick if you use them properly.

Using a primer and tinting it to match the color of the paint you’re applying will ensure that the surface is covered evenly. This will help the paint bond more effectively with the wood or other surfaces you’re painting.

Techniques

Painting and refinishing cabinets involve a series of steps that require specialized knowledge, tools, and materials. The simplest method is to use paint, but stains and other decorative finishes can also be used.

To start, remove the cabinet doors and drawers and prep the surfaces with a degreasing cleaner. This will ensure pristine paint adhesion later on.

Then, sand down the surface and fill any cracks or uneven areas with wood filler. Allow the cabinets to fully dry before moving on to the next step.

For a smoother finish, you can also apply a glaze. This adds a layer of color and highlights your cabinet’s unique features.

Another option is to refinish the wood grain on your cabinet doors. It is a little more difficult to do this, but it can make your cabinets look much more modern and contemporary.

Final Results

Cabinet painting is a great way to get the look you want without having to replace your cabinets. The key is to choose the right paint, prep properly and follow proper techniques.

Then, paint your cabinets, allowing them to fully dry in between coats. It’s important to sand your doors before painting so they don’t have any thin areas that will show through the new finish.

It’s also important to remove all the hardware before painting to avoid any drippings or drips. Place the hardware in clear bags labeled according to which door/drawer it belongs to.

Unless your cabinet doors are made of thermofoil or laminate, they won’t hold up to refinishing. Refinishing will usually require sanding the doors to the proper finish, filling in any cracks or uneven areas with wood filler and letting the cabinets completely dry.

ITZ Construction can help with all your cabinet refinishing, painting and kitchen remodel needs. Give us a call today.

How To Clean A Concrete Patio

If you want to clean your concrete patio, there are many different methods you can use. Whether you’re dealing with grease stains, mildew or algae, there are a few ways to get your patio clean and looking its best.

The first thing you need to do is remove any furniture, grills or plants that are sitting on your patio. This will make it easier to clean and give you more room for the cleaning solution.

Bleach

Bleach is a safe and effective way to clean concrete patios. It disinfects the surface and removes unwanted stains, such as mildew and moss.

Bleaches can be used on their own, with detergent or mixed with water to form a cleaning solution. They are also effective in removing black mold and mildew from concrete surfaces.

When diluted, bleach can also be used to remove rust stains. Just mix a few drops of bleach with water and spray on the area to clean it.

Then, scrub the spot using a push broom. Let it sit for about 15 minutes before rinsing it off with a garden hose.

When working with bleach, it is important to wear rubber gloves and protective eyewear. This is because it can cause irritation if you inhale the fumes.

Hydrogen Peroxide

Concrete is an ideal choice for patios, but it can get dirty over time. Debris, spills and weeds can stain the surface.

When this happens, its time to clean it. One good option is to use a bleach-based solution to remove these stains.

Hydrogen peroxide is a bleaching agent that is safe for plants and works well to whiten stained concrete. When mixed with dish soap and baking soda, it can remove a wide range of stains from patios.

To clean a concrete patio with hydrogen peroxide, you’ll need a bucket or spray bottle and some protective eye gear. After mixing the cleaning solution, spread it out on your concrete patio and leave for 15 minutes.

Baking Soda

Baking soda is an excellent natural cleaner for concrete patios. The slightly abrasive nature of the baking soda combined with water helps break up dirt and grease.

Mixing one part baking soda with one part water is a gentle cleaning solution, while mixing it with distilled vinegar can dissolve tough stains and grease. For a more powerful cleaning solution, add a little bleach to the mixture.

To remove rust stains from your concrete patio, apply a paste of hydrogen peroxide and baking soda to the stain. Allow the solution to sit for about 20 minutes. Scrub the area with a wire brush until the stain is gone.

You can also use baking soda as a mild fertilizer for garden plants. A solution of 1 tablespoon of baking soda to two quarts of water feeds hydrangeas, geraniums and begonias. It lowers the soil’s acidity to encourage blooms. It can also help tomato plants fight black spot fungus.

Vinegar

Vinegar is a natural, all-purpose cleaner and one of the best spots and stain removers for concrete. It also helps prevent stains and discoloration from occurring.

The vinegar-water solution can be applied with a brush or mop to clean a patio’s surface. Allow the mixture to sit for about 15 minutes before rinsing it off.

Bleach is another good way to remove mildew and moss from concrete. However, it can be harmful to nearby plants and weeds so use sparingly.

Baking soda is a good alternative to bleach and it can also be used to clean concrete. The abrasive texture of baking soda gives it the scrubbing power to break up dirt and grime.

White distilled vinegar is the most recommended type for cleaning concrete. It doesn’t contain any coloring agents so it won’t stain the surface.

Cleaning your concrete can be done yourself or call your general contractor Jacksonville Fl to help!

How Much Does Fencing Cost

If you’re thinking about installing a fence on your property, it’s important to know how much fencing costs. The cost depends on the material, style, and height of the fence you want to install.

Wood fencing is a popular choice for many homeowners. It’s durable and comes in a variety of styles and colors. However, wood can be costly to maintain and requires frequent repairs or replacement.

Cost of Materials

Fencing costs depend on the type of fence, its length and height, and the materials used to build it. The materials you use can range from wood to aluminum and vinyl, and the cost of the project will depend on your budget and the contractor you hire.

The cost of fencing also depends on the size and shape of your property, which will determine how much lumber is needed and how much labor is required to construct it. The amount of time it takes to install a fence will also impact the total price of the project.

The most popular fence material is wood, which can range in price from $15 to $33 per linear foot depending on the type of wood you choose. Cedar is a common option, and it can last for years when properly treated with oil or preservatives. It is resistant to moisture, rots, and insects.

Cost of Installation

Adding fencing to your home is a great way to increase the value of your property, protect your belongings and keep your pets safe. Installing a fence is also an easy and cost-effective way to add curb appeal and make your house more inviting.

The installation cost of a fence depends on the materials used and the size of the project. The average price for a basic, standard-size fence ranges from $1,667 to $4,075, with labor and materials costs accounting for about half the total cost.

Wood is a popular material for fencing, as it is affordable and long-lasting. It can be stained or painted to suit your personal style.

Aluminum is another common metal choice, as it is lightweight and low in maintenance. However, it can dent more easily than iron.

Fencing installation is also affected by the terrain of your property. If the ground is rocky or sloped, you’ll need to build extra protection around your fence posts. Additionally, if there are existing features in your landscape that could block the path of your fence, you’ll need to remove them.

Cost of Permits

Before you start work on your new fence, you should know how much it will cost to obtain a permit. A building permit will ensure that your new fence is built according to local codes and zoning.

Permits vary by area, so check with your local city or county for information about the requirements. They can also provide an online fee schedule that outlines costs by project type and size.

In addition to permitting, some municipalities require inspections after construction is complete. These inspections are often done by a local building inspector.

If you’re working on a large project, such as a room addition or remodeling your kitchen, the cost of permits will depend on the total size and value of the project. Contractors typically include permit fees in their final estimates, so you can budget accordingly.

Cost of Removal

Removing a fence can be a labor-intensive and expensive task. This process requires specialized tools and a means to dispose of the materials.

The cost of removal can vary by the type of material used. For example, chain link fences are often easier to remove than wooden ones.

Also, the location of the home affects the overall cost. Generally, costs in rural areas are lower than those in more urban areas.

Another factor that can increase the cost of fence removal is the presence of concrete footings. This cement is typically used to anchor the posts into the ground and can be difficult to remove.

Usually, contractors will include removal fees in their linear foot rates. It is important to ask if these fees are included or not.

ITZ General Contractor and Design service is a great choice for all your Florida fence and deck needs.

How Long Does A Bathroom Remodel Take

The answer to the question “how long does a bathroom remodel take” depends on the scope of the job. A partial remodel – changing out the plumbing, flooring and lighting but keeping the existing footprint – can sometimes be completed in a matter of days.

A full-fledged bathroom remodel that guts the space, changes the footprint and moves electrical wiring and plumbing lines can take three weeks or longer.

Cost

Bathrooms are one of the most popular home improvement projects. They’re also an excellent way to add resale value to your home.

Depending on the size and scope of your bathroom remodel, costs can vary significantly. However, there are a few things you can do to reduce the costs of your remodel.

Costs can be affected by the materials and features you choose, as well as the level of craftsmanship. For instance, a high-end remodel with custom-crafted materials will cost more than a low-end remodel with standard fixtures.

You can lower your overall cost of a bathroom remodel by choosing to upgrade certain aspects of the room rather than replace them all. For example, upgrading the lighting can make a huge difference to your budget.

Time

Whether you’re looking for more space or an easier-to-navigate bathroom, a bathroom remodel can be a big improvement. You can add new storage, a dual-sink vanity, or a new layout to create a space you’ll love to use.

Once the basic construction is done, you’ll need to get all of the plumbing and electrical in place. This can be a slow, labor-intensive process, but it’s essential to ensure that your bathroom will function properly once the work is finished.

The time it takes to complete a bathroom remodel can vary depending on the project. However, it’s always a good idea to allow enough time for everything from design planning to getting materials to your home. This will help avoid issues that can cause delays and cost overruns.

Planning

Whether you are in the market for a home remodel or just looking to freshen up your space, it’s always a good idea to plan ahead. Getting your budget and timeline set up early will help you stay on track for a successful bathroom renovation.

Changing the layout of your bathroom can be a major undertaking. It will involve moving plumbing and wiring, as well as changing the location of fixtures like the tub/shower or toilet.

You should also consider adding storage space in the room, which can help reduce clutter and make your bathroom more functional.

Another important consideration for a bathroom remodel is energy efficiency. Upgrading your current fixtures to newer, more efficient ones can save you money in the long run on your water bill.

It’s also a great idea to consider putting in eco-friendly options for your bathroom, such as low-tox, biodegradable and recyclable materials. These can increase the value of your home if you ever decide to sell it in the future.

Materials

The materials you use in a bathroom are an important part of the design. Choose materials that will work well together and reflect your tastes.

Walls and countertops are two major areas where you can make a big impact with your choice of materials. For walls, consider tile or a fresh coat of paint, depending on your budget.

Countertops are also a good choice for bathroom remodels, especially when you are able to use inexpensive materials. Granite, marble and solid surface materials such as quartz are great choices because they are durable, attractive and easy to clean.

Laminate and engineered woods are less-than-desirable bathroom countertop options due to their tendency to swell and warp after moisture seeps in.

Once you have a clear picture of what you want for the new bathroom, it is time to start ordering materials. This can take a while, as some materials have long lead times.

Your bathroom remodel jacksonville fl is a general contractor that can take your bathroom remodel needs to the next level.

5 Remodeling Ideas That’ll Make Your Beach House The Talk Of The Town

You know what they say, home is where the heart is. But what they don’t say is that sometimes, your home needs a little bit of TLC to make it feel like, well, home. That’s where remodeling comes in! Whether you’re thinking about a full-scale renovation or just a few cosmetic changes, remodeling is a great way to put your own personal stamp on your house and make it feel more like YOU. Plus, it can be a fun and rewarding project to take on, giving you a sense of pride and satisfaction when it’s all said and done. But if you’re not careful, remodeling can also turn into a money pit. So how do you strike the perfect balance? Here are 5 beach house remodel ideas that’ll make it the talk of the town without breaking the bank.

1. Rip out that old shag carpeting:

Nothing screams “1970s” quite like shag carpeting… in ANY color. If you’re still rocking the shag, it’s time for an update. You don’t have to go crazy with flooring – even ripped out carpet and stained concrete can look chic and modern. But whatever you do, get rid of that shag! It’s time to move on to something new and exciting – something that won’t make your home look like a time capsule from the past. So if you’re ready for a change, ditch the shag and give your home a much-needed makeover. Your feet will thank you!

2. Give your kitchen a facelift

If your beach house is in need of a little pick-me-up, there’s no need to break the bank. Just give your eating space facelift with a mini kitchen remodel! Start by replacing hardware on cabinets, adding some new appliances, and painting the walls. If you really want to go all out, you could even replace countertops and backsplashes. With just a few simple changes, you can take your beach house from drab to fab in no time!

3. Create an outdoor oasis:

Why waste your time indoors when you could be enjoying the outdoors? If you’ve got a porch or deck, there’s no excuse not to turn it into an outdoor oasis. With some comfy furniture, string lights, and lush greenery, you can create a space that’s perfect for entertaining or just kicking back with a good book. So what are you waiting for? Get out there and start porch-ing!

4. Add some personal touches:

Personalization is key when it comes to making your house feel like a home. And what better way to personalize your space than with art, photos, and memorabilia from your travels? Not only will this make your house feel more like home, but it’ll also be fun for guests to see all the places you’ve been and things you’ve seen. Plus, it’s a great way to add some personality to your space. So go ahead and put up that map of the world that you’ve been itching to hang up. And don’t be afraid to show off those photos from your trip to the Grand Canyon. After all, home is where the heart is. And your heart is definitely in your travel memories.

5. Swap out generic fixtures:

Don’t be a hostage of ho-hum hardware! It’s time to ditch the dated doorknobs and ugly light fixtures. Boring white switch plates? More like blinding white switch plates. Trade ’em in for some interesting options. Out with the old, in with the new! When it comes to your home, it’s all about the little details. And that’s why we’re here to help you update and upgrade your home with some easy (and chic!) changes. Check out our selection of stylish switch plates, trendy door knobs, and fashionable light fixtures. With just a few small changes, you can make a big impact in the overall look and feel of your home. So go ahead and give your home a little facelift! We promise, you won’t regret it.

Conclusion: 

Remodeling your home is a great way to put your personal stamp on it – but it’s important to strike a balance between function and style, practicality and personality. With these five ideas for remodeling your beach house, you can make it the talk of the town without breaking the bank!

Make your beach house the best it can be. The best kitchen remodel Jacksonville Fl has seen and the best bathroom remodeling Jacksonville has.


9+ Kitchen Renovation Ideas That Will Transform Your Cooking Space

9+ Kitchen Remodeling Ideas That Will Transform Your Cooking Space

A kitchen remodel can be a big undertaking, but it doesn’t have to break the bank. With a little creativity and elbow grease, you can make your kitchen look new without spending a fortune. Here are seven kitchen remodeling ideas that will transform your cooking space without busting your budget.


1. Paint Your Cabinets:

A fresh coat of paint is an easy and affordable way to give your cabinets a facelift. If you’re feeling really adventurous, you can even try painting them a different color than the traditional white or cream. Just make sure to use paint that’s meant for cabinets so that it will hold up over time.


2. Replace the Hardware:

Another easy and affordable way to change the look of your cabinets is to replace the hardware. You can find new hardware at any home improvement store, and it’s relatively simple to install yourself. Just be sure to measure twice and drill once!


3. Add Some New Tile:

If your kitchen is in dire need of a makeover, then new tile might be the way to go. You can use tile to create a backsplash behind your stove or sink, or you can use it to create an accent wall. Either way, adding some new tile will give your kitchen a whole new look.


4. Get Organized:

One of the best ways to transform your kitchen is to get it organized. That means getting rid of any appliances or gadgets that you don’t use on a regular basis. It also means finding creative ways to store the things that you do use so that they’re easily within reach when you need them. Some people use mason jars to store spices, while others use tension rods to hang pots and pans from the ceiling. There are endless possibilities when it comes to getting your kitchen organized, so get creative!


5. Update Your Lighting:

Another quick and easy way to update your kitchen is by changing out your light fixtures. You can find inexpensive lighting at any home improvement store, and installing it yourself is usually pretty simple as well. Just be sure to turn off the power at the breaker box before you start working!


6. Add Some greenery:

Plants are not only beautiful, but they can also help purify the air in your home. So if you’re looking for a way to spruce up your kitchen and improve your indoor air quality at the same time, then adding some plants is definitely the way to go. Succulents and herbs are especially well-suited for kitchens since they don’t require a lot of sunlight or water, but you can really put any type of plant in your kitchen as long as it fits with your décor style.


7: Paint Your Walls:

If you want a dramatic transformation, then painting your walls is definitely the way to go. You can even add stripes or other design elements using painter’s tape if you’re feeling really adventurous! Just be sure to pick a color that compliments your cabinets and floors before you get started. And as always, remember to turn off the power at the breaker box before beginning any painting project! 


8. Get new appliances:

If your appliances are starting to show their age, it might be time for an upgrade. New appliances can make all the difference in both the look and function of your kitchen. When choosing new appliances, be sure to consider energy efficiency and whether or not they’ll fit in with the rest of your kitchen’s aesthetic.


9. Change the layout:

Sometimes, all your kitchen needs is a new layout. If you’re not happy with how your current layout functions, reconfiguring it can make all the difference. Of course, changing the layout requires more planning (and possibly even building permits), but it’s worth it if it means improving the overall function of your kitchen.

ITZ General Contractor and Design Services is a great choice for your kitchen remodeling Jacksonville FL needs.e

Scroll to top
ITZ license